
Quickstart, first deploy in 5 minutes
This guide walks you through deploying your first docker-compose.yml on
compose_run.
Prerequisites
- An account on app.composerun.eu
1. Create a project
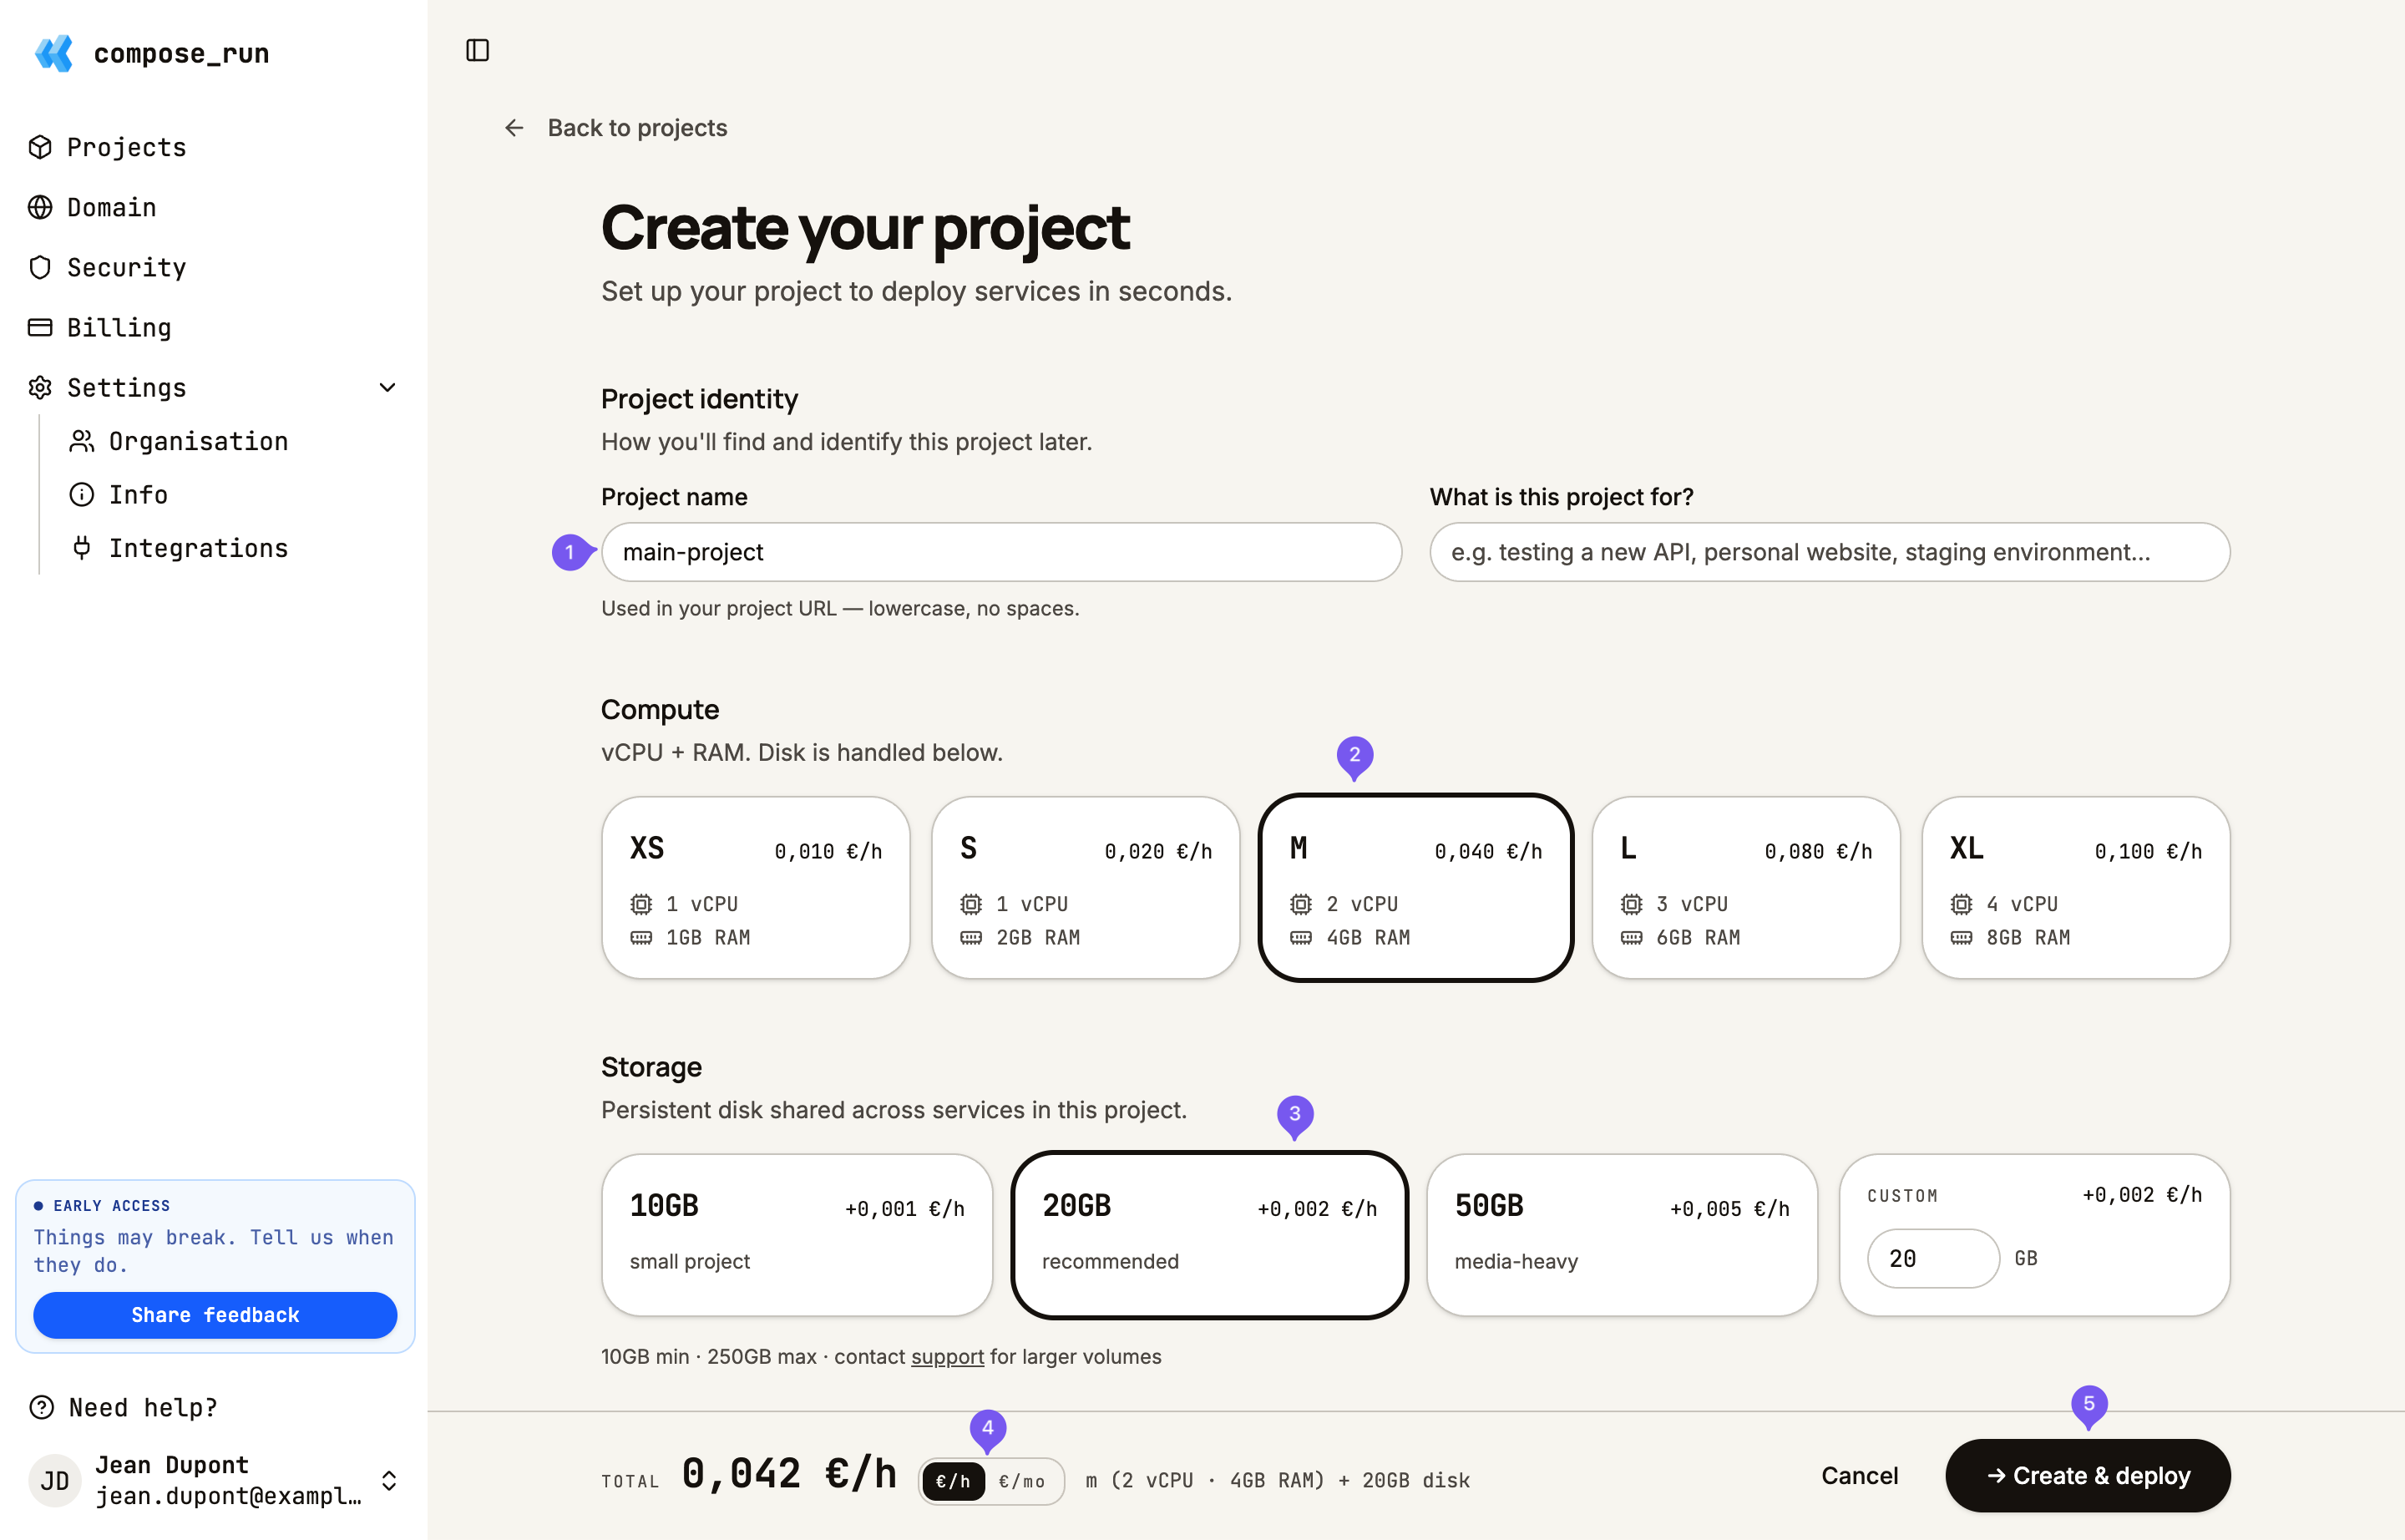
Sign in to the app, click New project, and fill in the form as shown in the screenshot below:
- Project name, used for display only
- Choose the project's hardware quotas
- Choose how much storage your project needs (this must cover your Docker image sizes plus your Docker volume data)
- Check how much the project will cost per hour or per month
- Hit Create and deploy, and the project will be spun up
2. Add a stack
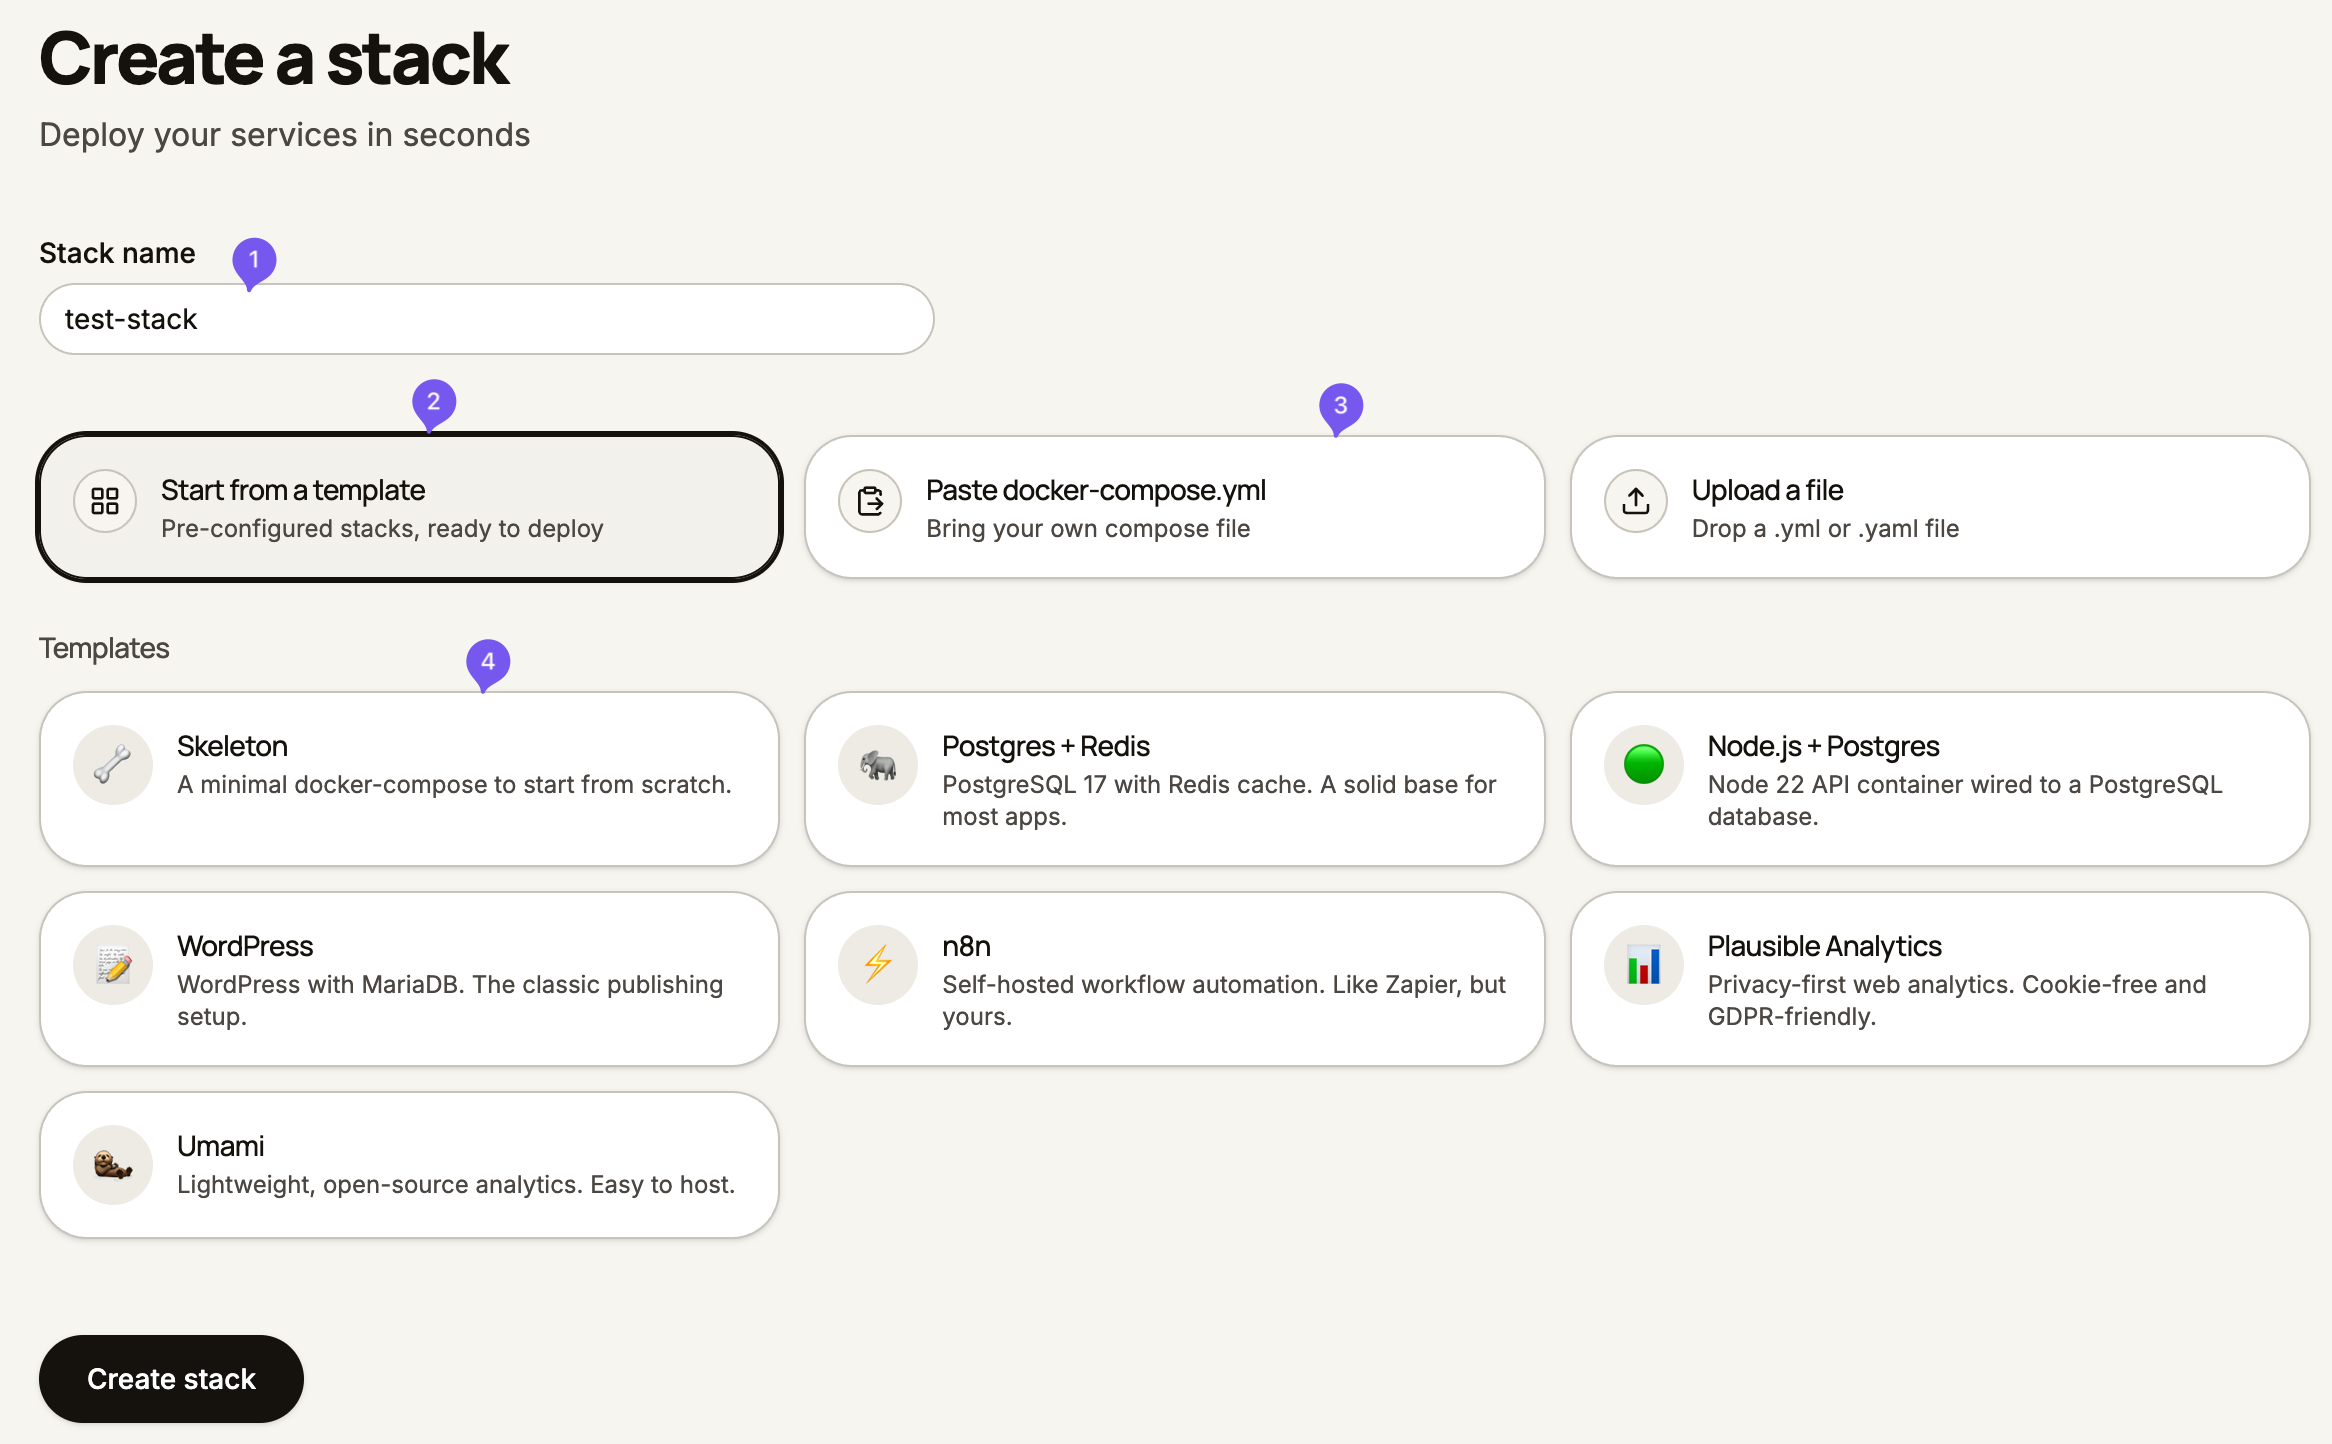
Once the project is created, you need to create the stack that will hold your Docker Compose file. In your project, click Add stack and fill in the form as shown below:
- Stack name
- Start from a template
- Start by pasting your docker-compose.yml file
- Choose the template you want to start with
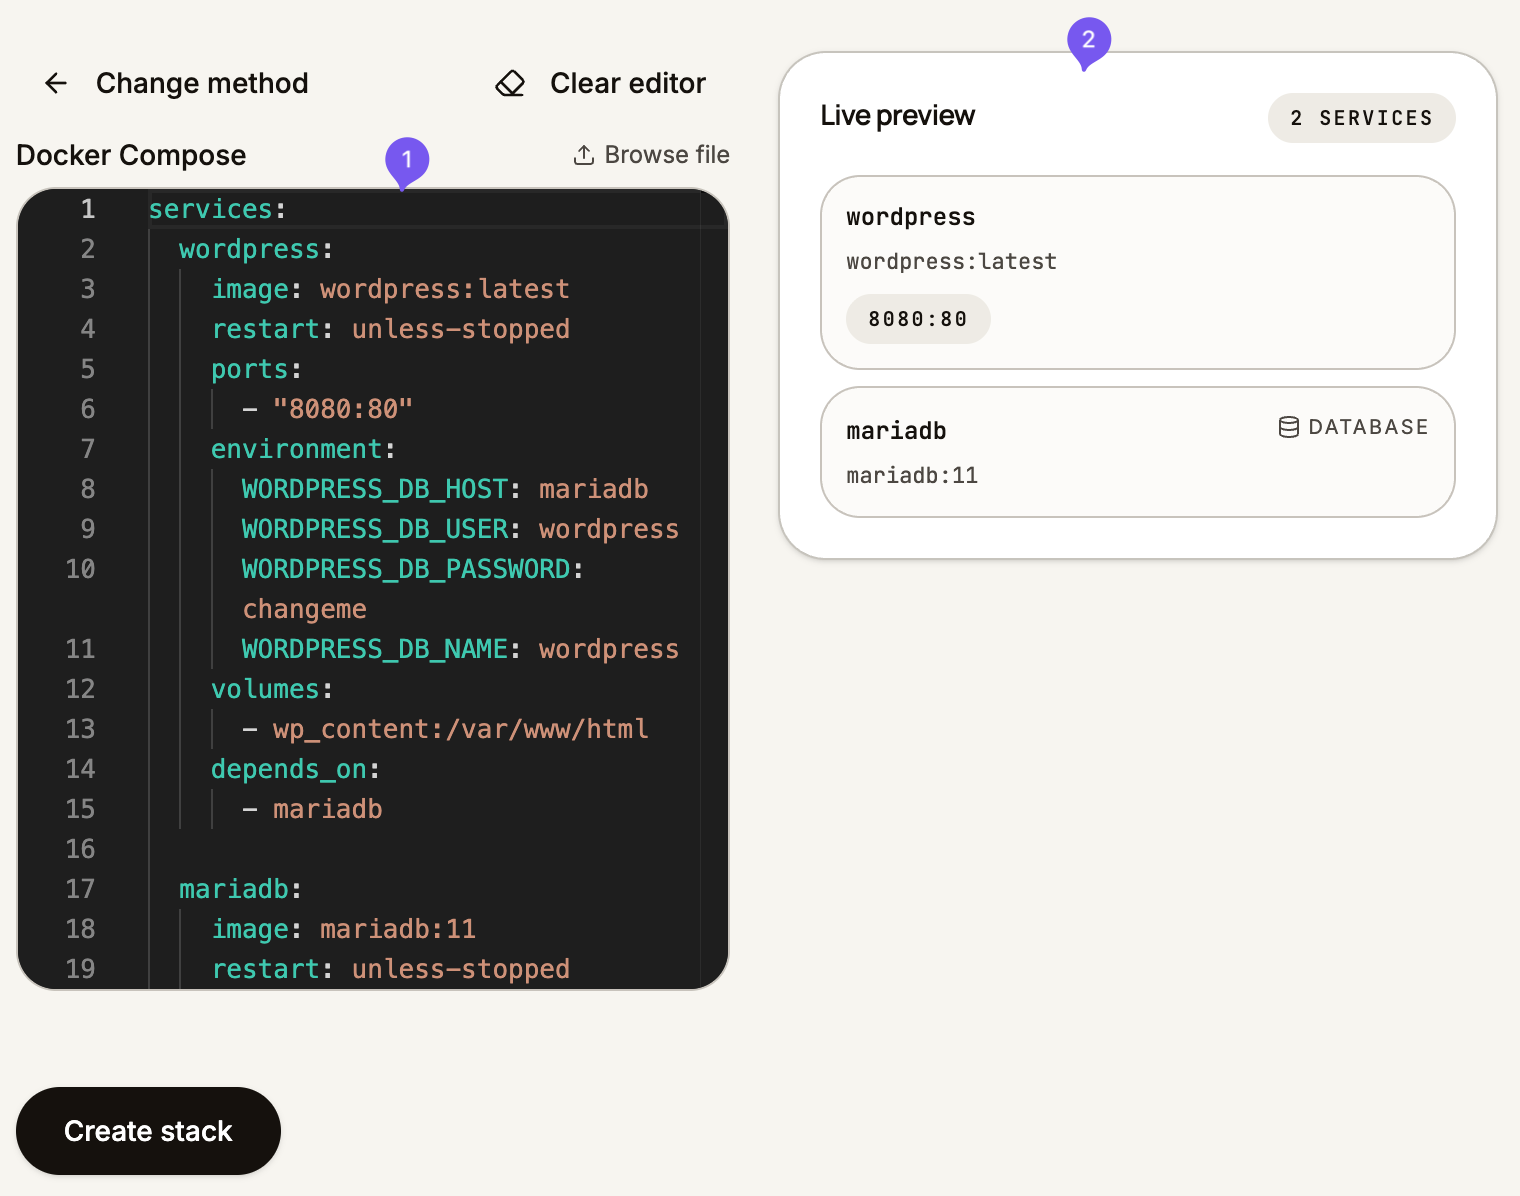
You can then review the Docker Compose file, edit it, and preview how many services the system detects.
- Preview/edit the docker-compose.yml file
- Preview the detected services
3. Deploy
Once the stack has been created, you can open the playground.
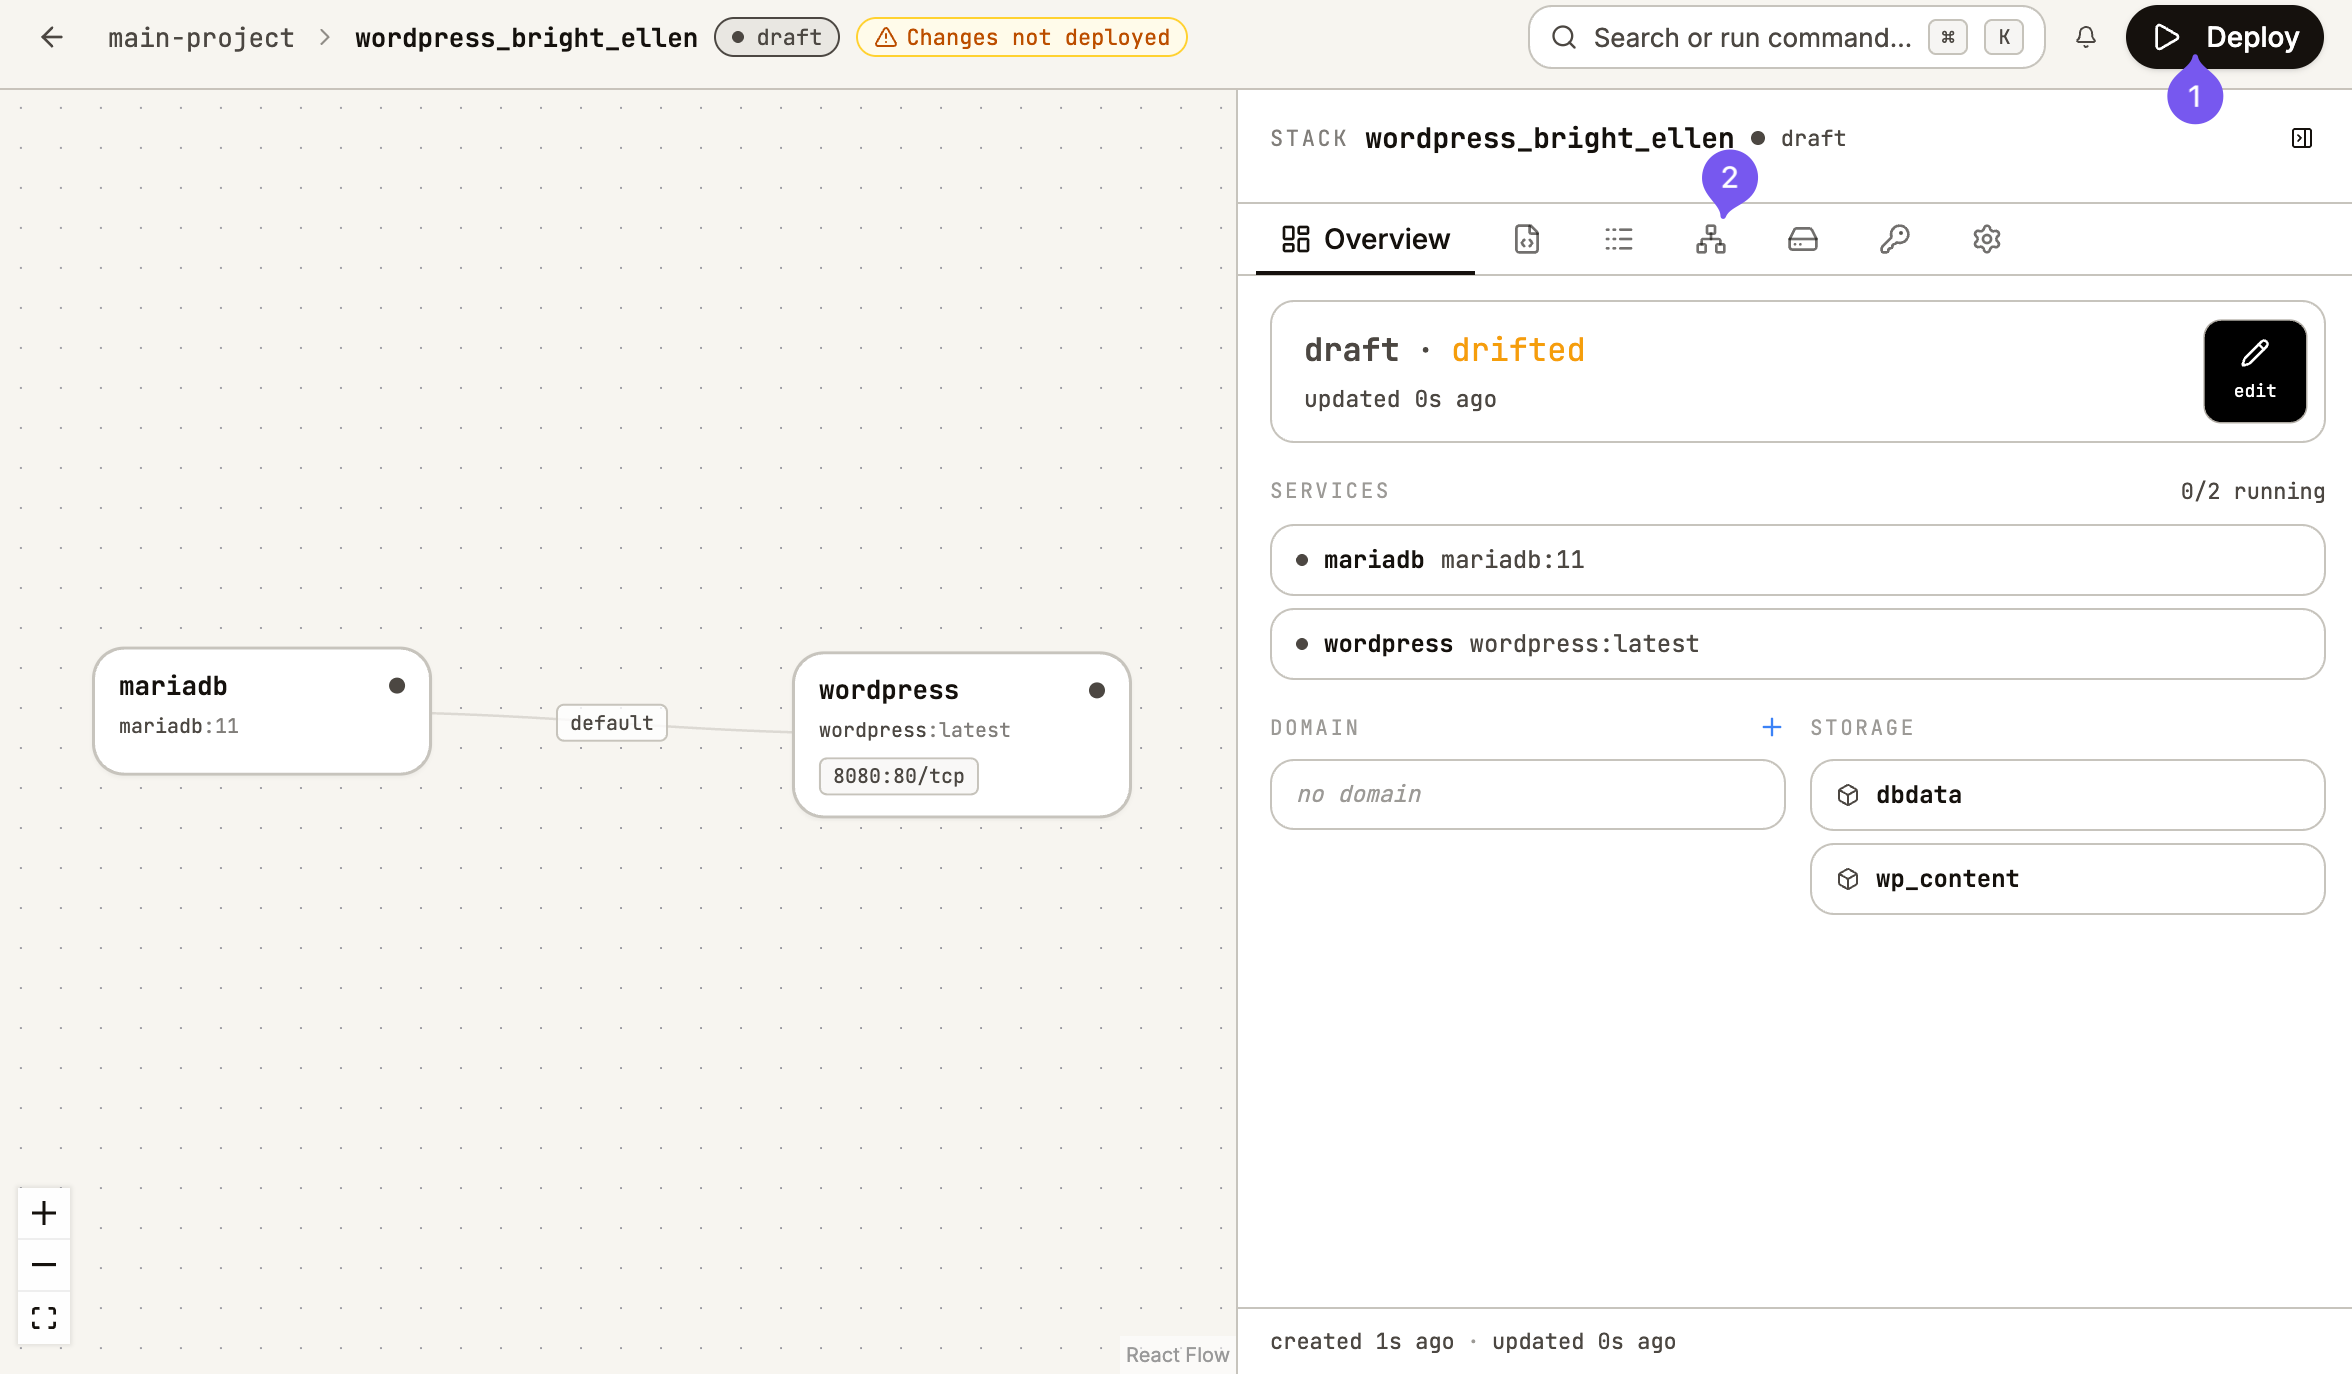
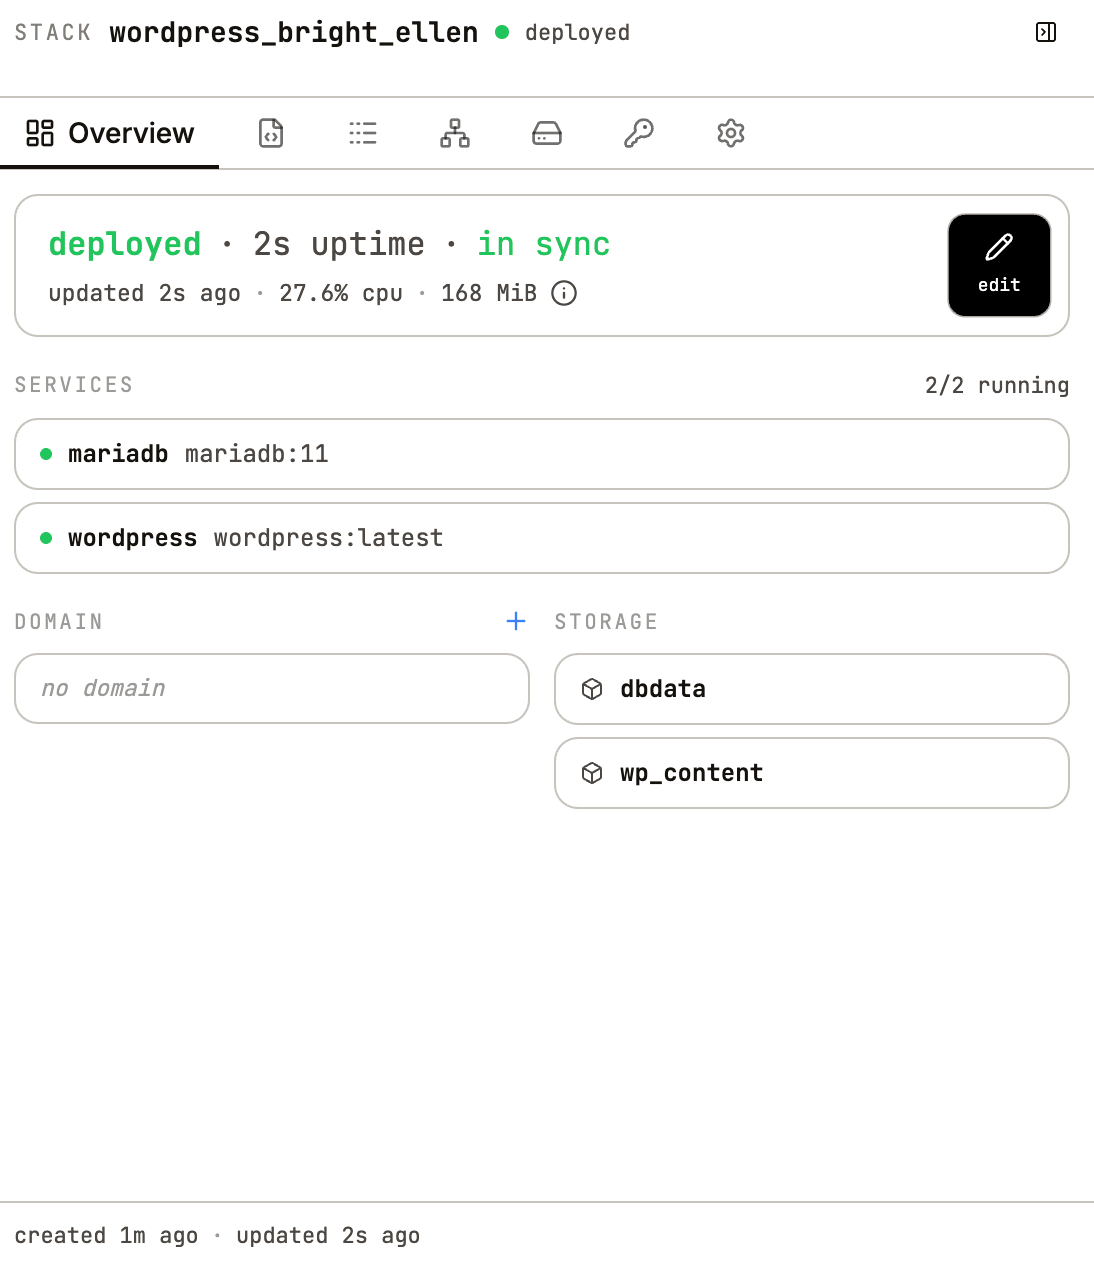
Once you hit the deploy button in the top right (1), the Docker images are pulled and deployed. When it's done, the stack overview reads "deployed", as shown below.
The "in sync" and "drifted" labels tell you whether what you see in the playground still matches what is actually deployed on the infrastructure.
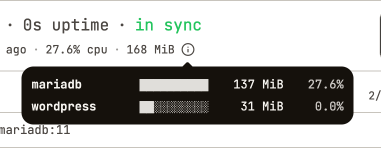
Hover the small info icon below the sync status to see how much CPU and RAM each stack is using.
4. See live logs
Once the deployment is finished, you can watch your Docker logs live in the logs tab, as shown below:
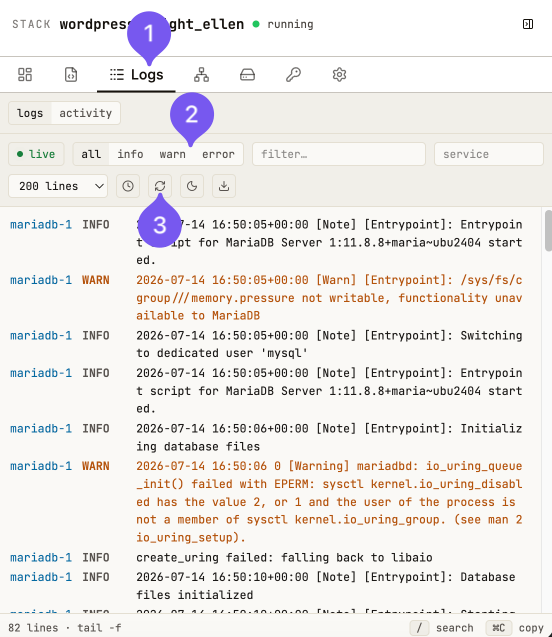
- Live logs tab
- Filter by log level
- Refresh the latest logs